
Easy-to -Grow Vegetables for Beginners
Easy-to -Grow Vegetables for Beginners You’re planning your first garden. No need to be afraid, we were all beginners once. Jenna Rich, a small-scale farmer and expert
This project all started with a shoe box full of old crayons. At the end of every school year, my kids would clean out backpacks and pencil boxes and dump their used crayons in the box. At the start of the new school year, they all received a fresh box of crayons to explore their creativity with. After my youngest completed grade school, I thought it was high time to do something with the shoe box full of used crayons and put them to good use.
My first thought was candles. Who doesn’t need a few emergency candles in their house? We use ours every couple years or so when the power goes out and there are not enough lanterns or flashlights with fresh batteries to go around.
EDIT: IMPORTANT NOTE ABOUT THESE CANDLES: WE MADE THEM, LIT ONE AND IT BURNED FINE WHILE WE WERE TAKING PICTURES FOR THIS POST, BUT THE TRUTH IS WE FELL PREY TO THE CRAYON CANDLE IDEA VIA THE INTERNET AND DIDN’T FULLY TEST THE CANDLE BY BURNING IT ALL THE WAY DOWN. WE RECEIVED COMMENTS THAT SUGGESTED CRAYON CANDLES JUST DON’T WORK. SO, WE PUT ONE OF OUR CANDLES TO THE TEST. THE CANDLES BURNED FINE FOR ABOUT 3 MINUTES, THEN THE FLAME DIMINISHED TO ALMOST NOTHING – MAKING IT NOT A GOOD CANDLE. EVIDENTLY, THE PIGMENTS IN THE CRAYONS CLOG THE WICK AND DO NOT ALLOW THE WAX TO FLOW UP THE WICK. WE ARE DISAPPOINTED AND SORRY IF YOU MADE THESE CANDLES WITH CRAYONS. WE STILL LOVE THE CUPCAKE CANDLE IDEA AND THE PACKAGING, BUT SUGGEST YOU CHOP UP OLD CANDLES OR USE CANDLE MAKING WAX FOUND AT THE HOBBY STORE IN THE CANDLE MAKING SECTION.
Table of Contents
ToggleIs it just me, or do these containers of crayon bits look a lot like vegetables? You can probably imagine that it took a little bit of time to peel the labels and chop up a shoe box full of crayons, let alone sort them into color families. But that is exactly what I did, except I did the sorting first.
Let me tell you, all crayons are not made the same. Some companies put way too much glue on the wrapper, making the paper very difficult to remove. Some crayons chop with ease, and others . . . well, not so much. It did seem that the fresher the crayon, the easier it was to peel and chop. In my personal opinion, Crayola brand was by far the easiest to work with.
The quickest method to I found to process the crayons was to use a sharp box cutter. I sliced the paper with the box cutter and in most cases, it was easily removed. I sorted, removed paper and then I chopped, and chopped some more until all the crayons were chopped into pieces. How long did it take to peel and chop a shoe box full of crayons? It took an entire evening, but I was determined to get it done. After all, I have a post to get published! I went through 3 blades on the box cutter.
Now you may be thinking, why chop so small? These pieces are roughly a quarter inch. The reason I chopped them this small is twofold, they melt faster, and two, you can get more crayon wax in the muffin cup this way. If the pieces are too large, you won’t be able to get a decent sized cupcake candle.
I put cupcake liners in old muffin tins and filled them up with crayon bits. The muffin tins were set on cookie sheets – just in case there was any spill over. I put them into a preheated 350 degree oven. In my oven they took about 10 to 12 minutes to melt to a liquid. Be sure to watch them closely, you don’t want wax bubbling all over your oven!
If you see the wax start to bubble – take them out of the oven. Set on the counter to cool. When the wax starts to solidify, insert the wicks. It’s better to have too long a wick than too short. You can always trim them later. If the wick falls over or doesn’t stand up – it was too soon. I did that on the green candle in the below picture. I inserted the wick and it immediately slid into the wax, so I waited longer and was successful with the rest of them.
I let the candles set for an hour, because I had other things to do, and then removed them from the tins. I’m sure you could remove them as soon as they are cool. When the candles were removed, I was surprised to find wax in the tins, but there it was. To easily remove wax, pour boiling water into the cups.
The wax will float to the surface and you can easily remove it with a spoon. This made the clean up really easy.
I removed the cupcake liner and stacked the candles in Mason Jars. I had purchased a package of matches at the Dollar Store and put a box of matches at the top of each jar. They fit so nicely!
I made a few labels to tie onto the jars. I’m sure you can come up with a lot more references to ‘giving light’.
The mason jar lid makes a great platform to burn the candle on too. I think these make darling gifts. If you don’t want to spend your time chopping up used crayons, you can buy candle making wax at most hobby stores, although I haven’t seen any wax available with such vibrant color.
If you enjoyed this project, we’d love if you’d Pin It to share! Thanks so much for supporting this blog.

Easy-to -Grow Vegetables for Beginners You’re planning your first garden. No need to be afraid, we were all beginners once. Jenna Rich, a small-scale farmer and expert

Ever wondered how I grow Asparagus? Although I’ve been gardening for many years, I didn’t always grow asparagus. I was reluctant to dedicate a garden

Garlic is a crop that’s easy to grow and requires very little care. If you save a few heads from each harvest to plant the

Growing carrots is not easy. A carrot bought at the grocery store will never taste as good as a carrot picked fresh from your garden. There
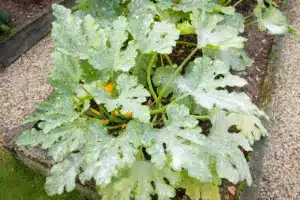
No one can fault gardeners for thinking that their Zucchini plants have powdery mildew. This is a common fungal infection that looks like white powder has
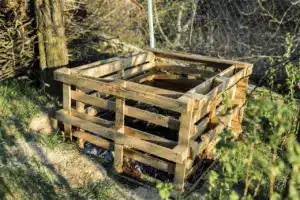
In my years of composting, I have tried almost every method. I’ve tried everything from an open pile in my backyard to expensive double-bin devices that