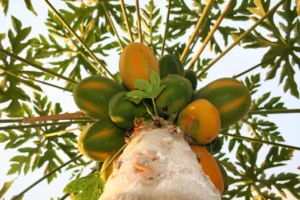
How to Grow Papaya From Seeds at Home
How to Grow Papaya From Seeds at Home: a Complete Guide Papayas are not only delicious tropical fruits, but they’re also a nutritional powerhouse. They
Today we are participating in a fun Upcycle Challenge with a few of our blogging friends. The challenge was to create something using clothing material – old shirts, pants, sweaters, socks, or anything else made from material. We used worn wool socks to create this fabulous Rustic Christmas Garland. I know it is a little early to be sharing Christmas projects, but for the DIY’er, it’s never too early!.
Supplies Used:
Mr. Hobby handed me a pile of wool socks with holes in the heels and asked me if I knew how to darn socks. I remember that my Mom used to darn socks a long time ago, but this was not a skill I had acquired. They sat in a pile for a long while, and eventually Mr. Hobby purchased new socks. I knew the socks would be perfect for what I had in mind for this upcycle challenge project.
Table of Contents
ToggleCut a simple pattern out of paper. To tell you the truth, I wasn’t very exact with it, and trimmed it until it covered a 4th of the small Styrofoam ball.
Socks are great for this project because they have elastic in them, not to mention that there were several different neutral colors in each sock.
Four pieces of wool were cut for each Styrofoam ball.
Next, I used hot melt glue to attach the wool pieces to the Styrofoam balls. I put the glue directly on the wool piece and then attached it to the ball shape which greatly minimized the Styrofoam from melting too much.
The elastic in the wool helped to stretch the wool when needed to be able to cover the Styrofoam easily.
Using a tapestry needle, I strung the wool balls onto a length of gray Hemp Cord, alternating red bells to add just a touch of color to my garland. I think silver bells would have been pretty too. You could just add an individual string to each wool ball and make ornaments out of them instead of a garland. Up to you.
I wanted to show how the garland would look on a Christmas tree. This was more of a challenge than making the garland because I didn’t have a Christmas tree. So, I made my own. I clipped a few branches from my bushes. They needed a little trimming anyway and made my own sorry-looking tree.
Yes, my hastily put together Christmas tree is misshapen & small, and the garland doesn’t hang well because the branches are not very strong. But you get the idea, right?
This garland it going to look fabulous on my real Christmas Tree this year. Can’t wait! I’ve never done a rustic Christmas tree before and I’m looking forwarding to it.
Thank you for sharing!

How to Grow Papaya From Seeds at Home: a Complete Guide Papayas are not only delicious tropical fruits, but they’re also a nutritional powerhouse. They
Top Gardening Tools: Essentials for Beginners It is an exciting journey to start a garden, but it requires more than the right soil and plants. The

Vegetable Gardening for Autumn: How to Prepare your Garden for a Bountiful Harvest Many gardeners shift their attention from summer planting to fall planting as
What to Plant for Your Fall Garden The fall is the perfect time to enjoy your garden, with its abundance of flowers, fruits and stems. Planting
August Gardening Tips – Your Monthly Checklist We’re on the cusp of summer and fall, despite the heat. The time to plant summer crops such as
Dahlia Flowers – How to Grow Dahlias by the Bunch Dahlias come in a variety of colors and shapes, and they add style to any