Grow Your Own Dill
If there’s one herb that perfectly balances aromatic and tangy flavors, it’s dill. Renowned for its subtle citrus-like fragrance, dill is a versatile seasoning in the kitchen. Whether sprinkled fresh over baked potatoes, used as a garnish for fish dishes, or mixed into refreshing summer salads, dill adds a vibrant touch to any dish. But its culinary uses don’t stop there. The delicate, feathery leaves of dill pair wonderfully with egg dishes and creamy dressings, while its seeds are prized for their earthy, slightly sweet flavor in pickling recipes.
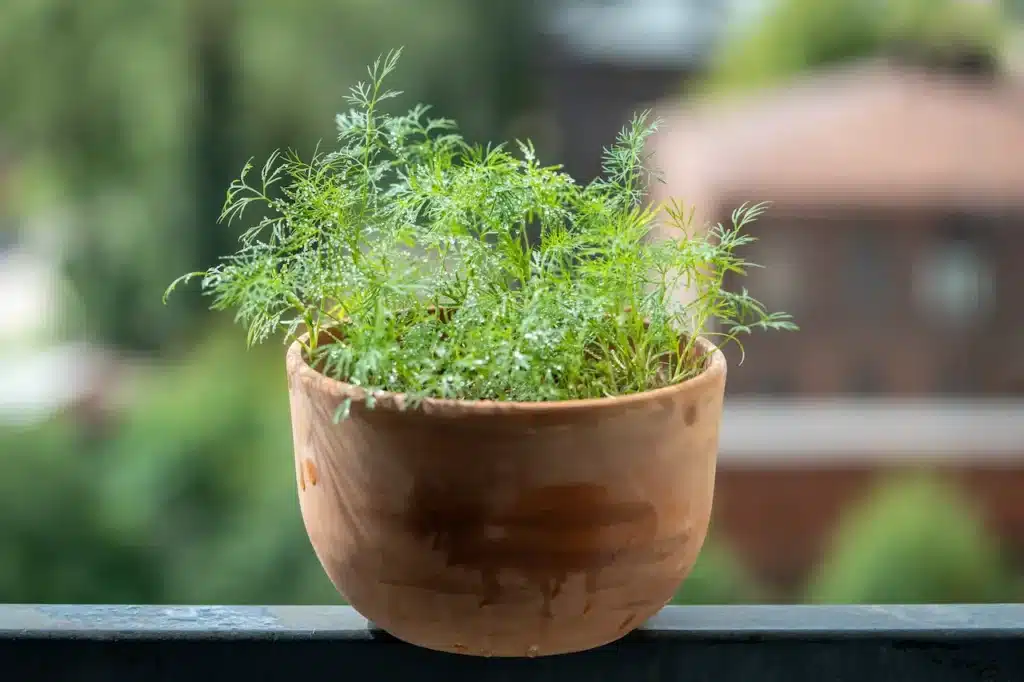
While dill is an easy herb to enjoy once it’s in your garden, it can pose some challenges in the growing stages. The most difficult part of growing dill lies in starting it from seed, particularly for those new to gardening. Dill’s feathery leaves are prone to damage from harsh weather, such as strong winds or extreme heat. But once you get past this delicate seed-starting phase, dill can be a highly rewarding herb to grow in your garden or containers.
In this guide, we’ll walk you through the process of growing dill from seed, from sowing the first tiny seeds indoors to harvesting the leaves and seeds for your kitchen.
Why Grow Dill at Home?
Before diving into the specifics of how to grow dill, it’s worth noting a few reasons why you might want to grow this herb in your own backyard:
– Freshness: There’s nothing quite like the taste of freshly picked dill. Growing your own guarantees that you have a constant supply of this fragrant herb.
– Convenience: With its ease of growth and low-maintenance care, dill can thrive in small spaces, making it a great choice for home gardeners with limited garden areas or those growing in containers.
– Cost-Effective: Buying fresh herbs from the store can get expensive, especially when you need them often. Growing your own dill is an inexpensive way to enjoy this delicious herb without breaking the bank.
– Versatility: Dill can be used in a variety of ways–whether for garnishing, cooking, or even pickling. Having it at home allows you to experiment with new recipes and enhance your dishes with its unique flavor.
Now, let’s get started with growing your own dill!
Step 1: Choosing the Right Variety
When it comes to growing dill, there are several varieties you can choose from. Most types of dill are suitable for home gardens, but there are a few considerations to keep in mind:
– Common Dill (Anethum graveolens): This is the standard variety and the one most people are familiar with. It grows tall and produces delicate, feathery foliage and aromatic seeds.
– Bouquet Dill: Known for its compact growth habit, bouquet dill is ideal for container gardening or small spaces. It produces a rich flavor, and the plants are slightly more tolerant of the heat.
– Fernleaf Dill: This variety is known for its fern-like, compact leaves and is perfect for small containers or for growing on windowsills. It’s also slower to bolt than other varieties, making it more reliable for extended harvests.
If you’re new to growing dill, consider starting with the common dill variety as it’s widely available and adaptable to most growing conditions.
Step 2: Sowing Dill Seeds
Dill can be started either indoors or directly in the garden. However, because dill’s delicate nature makes it prone to damage from extreme weather, especially during the early stages, it’s best to start your seeds indoors first. This method will give your plants a head start and allow them to grow strong before being exposed to harsher conditions.
Indoor Sowing (Recommended for Beginners)
1. Prepare the Containers: Choose a medium-sized pot or seed starter tray with drainage holes. A 3- to 4-inch pot is ideal for starting a few seedlings. Ensure the container is deep enough to support root growth.
2. Soil Preparation: Use a high-quality seed-starting mix. Dill prefers soil that’s moist, well-draining, and slightly acidic. Avoid using garden soil as it can compact and hinder proper drainage. A mix that retains moisture but allows excess water to escape is best.
3. Sowing the Seeds: Dill seeds are small, so it’s important not to plant them too deep. Simply sprinkle the seeds lightly on the surface of the soil. Cover them with a thin layer of soil, no more than 1/4 inch deep. Water the pot gently to keep the soil moist, but avoid soaking it.
4. Light Conditions: Place your seedling pots in a bright area that gets indirect sunlight. If possible, put them by a south- or west-facing window. Dill needs around 6-8 hours of indirect sunlight daily for optimal growth. If you don’t have enough natural light, you can also use grow lights.
5. Moisture: Keep the soil consistently moist, but not soggy. Water gently every day or every other day, ensuring the top of the soil doesn’t dry out completely. However, be cautious not to overwater, as this can lead to a condition called damping off, where the seedlings rot.
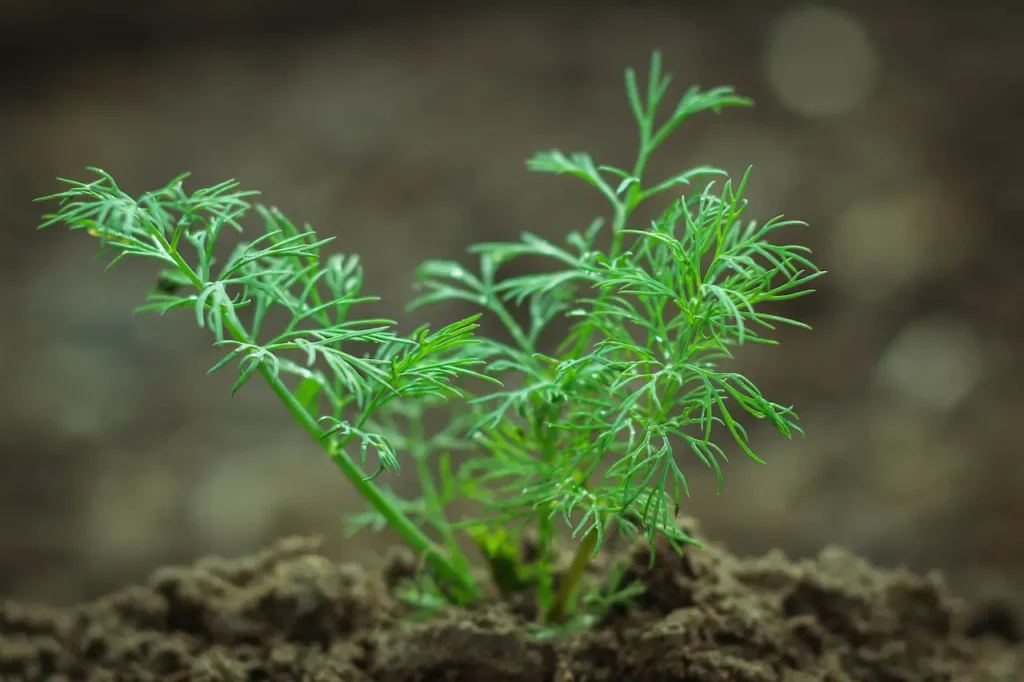
6. Germination: In about 7-10 days, your dill seeds will start to germinate. Dill seedlings are thin and delicate, so handle them with care during this stage. If necessary, cover the seedlings with a plastic dome or a cut plastic bottle to help retain humidity and warmth.
Transplanting Dill Outdoors
Once your seedlings are about 3 inches tall and have developed a few sets of true leaves, they’re ready to be transplanted outdoors. Dill thrives in full sun, so choose a spot in your garden that gets at least 6 hours of direct sunlight per day. Dill’s long, slender stems make it a perfect plant for raised beds, garden beds, or large containers.
1. Soil Preparation: Dill grows best in well-draining soil with a slightly acidic pH (around 6.0-7.0). Mix in organic matter like compost or well-aged manure to improve soil texture and fertility.
2. Planting Distance: Dill plants can grow tall, so be sure to space them at least 10-12 inches apart to allow them room to spread.
3. Transplanting: Gently remove the seedlings from their pots, being careful not to disturb their fragile roots. Transplant the seedlings into prepared soil, ensuring they are planted at the same depth they were in the pot. Water them thoroughly after planting to help settle the soil around the roots.
Step 3: Care and Maintenance
Watering and Soil Moisture
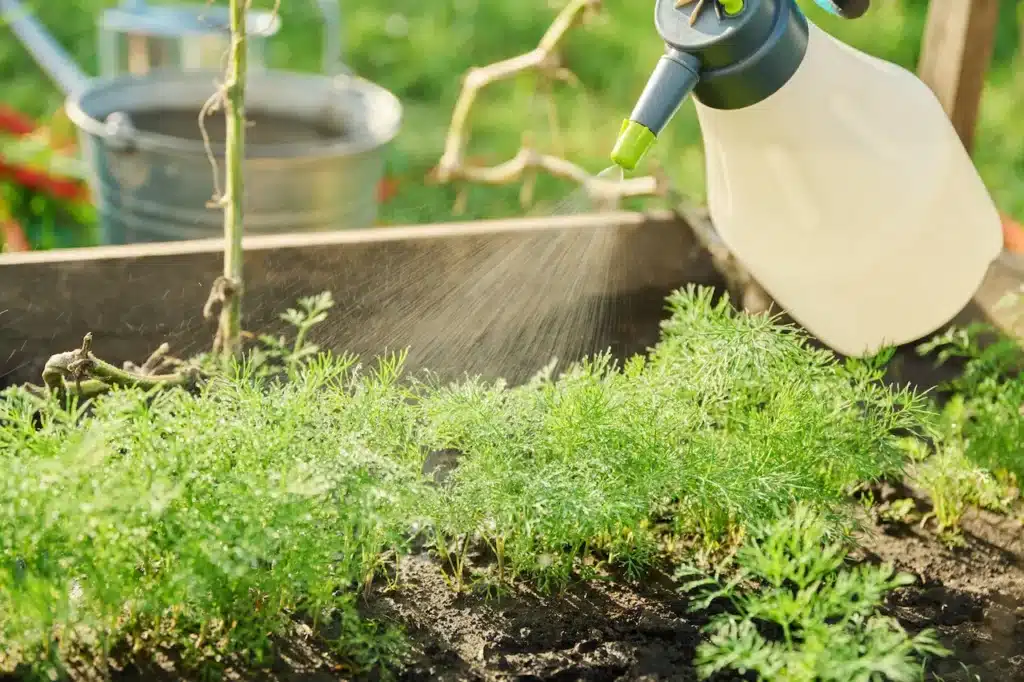
Dill plants prefer moist, well-drained soil, so regular watering is essential. During hot weather, you’ll need to water every other day or when the soil feels dry to the touch. Be sure to water at the base of the plant and avoid wetting the leaves, as this can lead to fungal issues.
Fertilization
Dill is a relatively low-maintenance plant when it comes to feeding, but it will benefit from occasional fertilizer. You can use organic fertilizers such as fish emulsion or compost tea every 3 weeks during the growing season. However, be careful not to over-fertilize, as this can result inoverly large leaves that lose the signature dill flavor.
Dealing with Heat and Overheating
Dill is a cool-weather herb, and extremely hot temperatures (above 30degC/85degF) can cause the plant to bolt (flower prematurely). To prevent bolting, provide some dappled shade during the hottest part of the day, especially in regions with long, intense summers like the Philippines. You can also mulch around the base of the plant to help retain soil moisture and keep the roots cool.
Pruning and Harvesting
Once your dill plants have grown to at least 8 inches tall, you can start harvesting the leaves. Use sharp scissors or garden shears to cut around 2-3 inches from the outer leaves, being careful not to damage the central growing point. If you want to encourage further leaf growth, avoid removing too much at once.
To preserve the flavor of your dill, it’s best to harvest in the morning when the oils are most concentrated in the leaves. You can continue harvesting the leaves as long as the plant hasn’t started to bolt.
Flowering and Seed Harvesting
Dill flowers are small, yellow, and umbrella-shaped, and they will eventually turn into seeds. The plant will naturally flower after several weeks of growth, and when the flowers begin to dry and turn brown, you can harvest the seeds. Wait until the seeds are completely dry before removing them from the flower heads. Store the seeds in a cool, dry place and use them for cooking or save them for next season.
Step 4: Troubleshooting Common Dill Problems
While dill is relatively easy to grow, a few issues may arise:
- Pests: Dill can attract aphids, caterpillars, and other pests. If you see pests on your plants, consider using organic pest control methods like neem oil or insecticidal soap.
- Leggy Plants: If your dill plants are becoming tall and thin, it may be a sign they aren’t getting enough sunlight. Ensure your plants are in a location that receives at least 6 hours of sunlight per day.
- Bolting: As mentioned earlier, dill may bolt when exposed to extreme heat or stress. Providesome shade during hot afternoons or try planting heat-resistant dill varieties.
Growing dill at home is a rewarding experience that allows you to enjoy fresh, aromatic herbs year-round. Although it can be a bit tricky to start from seed, especially with its delicate nature, dill is a low-maintenance herb that thrives once established. By following the right planting, care, and harvesting techniques, you can enjoy your own homegrown dill in a variety of dishes, from pickles to salads to baked potatoes. Happy gardening, and enjoy the fresh flavors of your homem
Grow Your Own Dill at Home: A Guide to Growing this Aromatic Herb.
Dill is the herb that balances aromatics and tangy tastes perfectly. Dill, which is known for its citrus-like scent, is an excellent seasoning. Dill is a great addition to many dishes. It can be sprinkled on top of baked potatoes or fish, or added into a refreshing salad. Its culinary uses are not limited to this. Dill’s feathery leaves pair well with creamy dressings and egg dishes, while the seeds have a slightly sweet, earthy flavor that is perfect for pickling.
Growing dill can be challenging. Growing dill is most challenging from seed. This is especially true for beginners. Dill’s feathery foliage is susceptible to damage by harsh weather conditions, like strong winds or extreme temperatures. Once you’ve gotten past the delicate seed-starting stage, dill is a rewarding herb that can be grown in containers or your garden.
This guide will walk you through growing dill indoors, from the very first seeds to the harvesting of the seeds and leaves for your kitchen.
Why grow Dill at home?It’s important to note a few reasons for growing dill in your backyard before diving into the details of how to do it. Fresh dill is the best. You can grow your own dill to ensure a steady supply. Dill is a good choice for those who have limited space or grow in containers. It’s easy to grow and requires little maintenance.
Cost-Effective: Fresh herbs can be expensive to buy, especially if you use them frequently. It is inexpensive to grow your own dill and enjoy the delicious herb.
Variability: Dill is versatile and can be used for a number of purposes, including cooking, pickling, and garnishing. It allows you to try out new recipes, and add a unique flavor to your food.
Let’s start by growing your own dill.
Step 1 – Choose the Right Variety
There are many varieties of dill to choose from. There are many types of dill that are suitable for growing in home gardens. However, there are some things to consider:
Common Dill – (Anethum Graveolens ) This is the most common variety. It is a tall plant with feathery, delicate foliage and aromatic seeds.
Bouquet Dill: This compact dill plant is perfect for small spaces or containers. The plants have a more robust flavor and are tolerant to heat.
Fernleaf dill – This variety is well-known for its compact, fern-like leaves. It is ideal for growing in small containers or on windowsills. It is also slower to bolt compared to other varieties. This makes it more reliable in terms of harvesting.
Consider starting with a common dill as it is widely available and can adapt to many growing conditions.
Step 2 – Sowing Dill seeds
Dill seeds can be planted either inside or outside. Dill is delicate and susceptible to weather damage, particularly in the early stages. It’s therefore best to start seeds indoors. This will allow your plants to get a strong start before they are exposed to harsh conditions.
“Indoor Sowing” (Recommended for Beginners).
1. Prepare the Containers: Select a medium-sized container or a seed starter tray that has drainage holes. For a few seeds, a 3- or 4-inch pot will do. Make sure the container has enough depth to allow for root growth.
2. Soil preparation: Use a high-quality seed starting mix. Dill likes soils that are well-draining and slightly acidic. Avoid using garden dirt as it can cause drainage problems and compact. It is best to use a mix that holds moisture, but lets excess water escape.
3. The seeds of dill are small and should not be planted too deeply. Sprinkle the seeds lightly over the surface of soil. Cover the seeds with a thin soil layer, not more than 1/4 inch thick. Avoid soaking the soil in the pot. Instead, water it gently to maintain moisture.
4. Light Conditions Place your seedlings pots in an area that receives indirect sunlight. Place them near a window that faces south or west. For optimal growth, dill requires 6-8 indirect hours of sunlight per day. You can use grow lights if you do not have enough light.
5. Moisture – Keep the soil moist but not soggy. Every day or every two days, water gently to ensure the soil does not dry completely. Overwatering can cause a condition known as damping off where seedlings begin to rot.
6. Your dill seeds should begin to germinate in about 7-10 days. Handle the seedlings with care as they are fragile and thin. Cover the seedlings if necessary with a plastic dome or a cut plastic bottle to retain moisture and warmth.
When your seedlings reach a height of about 3 inches and develop a few true leaves, you can transplant them outdoors. Dill grows best in full sun, so pick a location in your garden where it gets at least 6 hours of direct sunlight per day. Dill is a great plant for raised bed gardens, large containers, and garden beds because of its long, thin stems.
1. Soil preparation: Dill thrives best in soils that are well-draining and have a pH of 6.0-7.0. Add organic matter such as compost and well-aged animal manure to the soil to improve its texture and fertility.
2. Planting Distance: Dill can grow tall. To give them space to spread, you should plant them at least 10-12 inches apart.
3. Transplanting Remove the seedlings gently from their pots. Be careful not to disturb fragile roots. Plant the seedlings in soil that has been prepared, making sure to plant them at the same depth as they were planted in the pot. After planting, water them well to settle the soil.
Step 3 – Care and Maintenance
“Watering and soil moisture”
Watering regularly is important because dill plants like moist, well-drained ground. Water your dill plants every other day or whenever the soil feels dry. Water the roots of the plant, and do not wet the leaves. This can cause fungal problems.
Fertilization
Dill requires little maintenance in terms of feeding. However, it can benefit from fertilizer on occasion. You can use organic fertilisers like fish emulsion and compost tea once every three weeks during the growing period. Be careful to not over-fertilize as this will result in overly large leaves that lose their signature dill taste.
Dealing with Heat & Overheating
Dill is an herb that grows best in cooler temperatures. Extremely hot temperatures (above 85degF/30degC) can cause it to bolt. Provide some shade during the hottest time of the day to prevent bolting. This is especially important in areas with long and intense summers, like the Philippines. Mulch around the base to retain moisture and keep roots cool.
Pruning & Harvesting
You can harvest the leaves once your dill plant has grown at least 8 inches tall. Cut the outer leaves with sharp scissors or garden shears, taking care not to damage the growing point. Avoid removing too many leaves at once if you want to encourage more growth.
It’s best that you harvest your dill in the morning when the leaves are at their most concentrated. As long as your plant hasn’t begun to bolt, you can harvest the leaves.
Flowering & Seed Harvesting
The dill flower is small, umbrella-shaped and yellow. It will eventually become seeds. After several weeks, the plant will flower. When the flowers start to turn brown and dry, you can harvest the seeds. Remove the seeds from the flower head only when they are completely dried. Store the seeds on a cool and dry surface. You can use them to cook with or store them for the next season.
Step 4: Troubleshooting Dill Problems
Dill is a relatively easy plant to grow. However, there are a few things that may occur:
Pests: Dill attracts aphids and caterpillars. Consider using organic pest control methods such as neem oils or insecticidal shampoo if you notice pests on your plant.
Leggy Plants: If you notice that your dill plant is getting taller and thinner, this could be an indication they’re not getting enough sun. Make sure your plants receive at least 6 hour of sunlight each day.
As previously mentioned, dill can bolt if exposed to extreme heat and stress. Provide Plant heat-resistant varieties of dill or find shade on hot afternoons.
Conclusion
It is rewarding to grow dill in your own garden. You can enjoy aromatic, fresh herbs all year round. Dill, although it is difficult to grow from seed due to its delicate nature and can be difficult to maintain once established, is an herb that requires little maintenance. You can use your homegrown dill to flavor a wide range of dishes from pickles, to salads, to baked potatoes. Enjoy the flavors of homemade dill and happy gardening!

