Indoors about a month before my beds are ready for the season. It also gives me a glimpse of what is to come. This week, I share the essentials of seed starting for germinating and caring for seedlings.
Cabin fever can be cured by seed starting. Cabin fever is more common in northern states than it is here in Georgia, but the outside world has become dormant and I crave something green.
Since I started seed, February has been my third favourite month. My favourites are April and October because the seasons change. I don’t like snow or cold temperatures, but in Atlanta, Georgia I start edibles, ornamentals, and native perennials in February.
I start earlier each year. It’s in January. The peppers take longer to germinate so I start with them first. I already have 20 pepper seed flats growing.
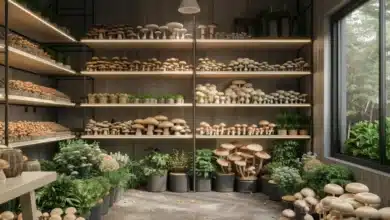
You can enjoy gardening for months before the natural start of things outside. My indoor seed-starting room is filled with greenery and seed trays from February to the time that seedlings can be planted outdoors.
It’s a comfortable, warm place to be. I spend a great deal of time in my seed starting room staring at tiny seedlings, trying to see them grow. Sometimes I check them every 15 minutes because of how quickly they can grow.
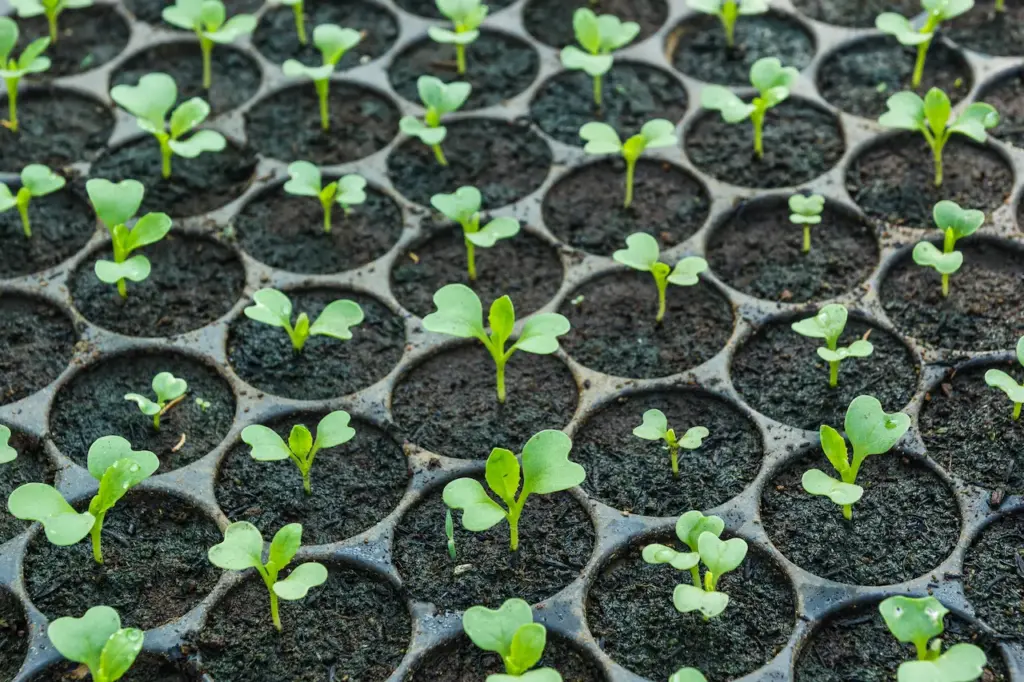
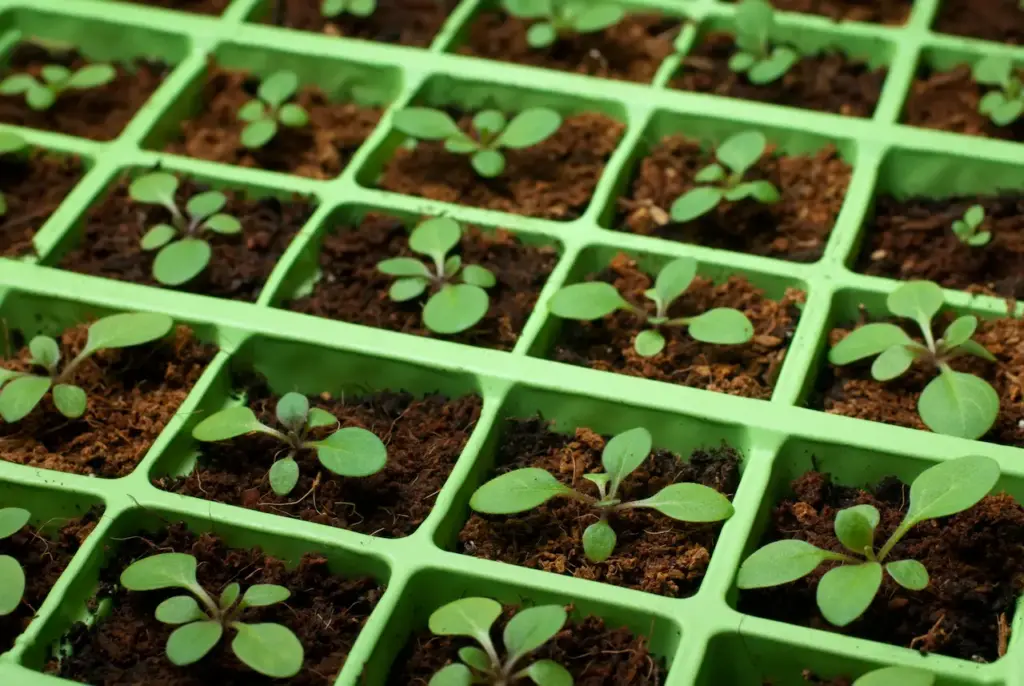
You can see so much happen: the transformation of a tiny seed into a healthy seedling that grows outside in six to eight weeks. You can see the rapid growth of a seedling in just a few weeks. You are noticing subtle changes day by day, week by week. And you play a major role in this. You will notice whether the actions you take — or do not take — result in positive or negative changes for the seedlings.
Back in 2010, I created a course for my Online Gardening Academy entitled Master seed starting. This comprehensiSeed Startinglessons focuses on the various methods of starting seeds and the different aspects of successful seed-starting, including light science as well as maintaining the right moisture level.
Now that we are in the launch week of Master Seed Starting, I’m offering a live free webinar on Seed Basics & beyond 9 Things to know before you start plants from Seed. Register for one of the remaining sessions. Thursday, January 26 at noon EST; Friday, January 27 at 12 noon EST; and Saturday, Jan. 28 at 10 am EST. Register now to reserve your place.
It takes a lot of learning about seed starting to feel confident and to know how to adapt and troubleshoot midstream. This week, in the podcast, I break down seed starting to its most basic elements so that you can feel confident about taking a course with me. I’ll get you started today with some solid information and you can move on at your own pace, or according to your budget.
You don’t need to be an expert to enjoy seed starting. You can expect seeds to germinate if you give them the basic needs. It’s in their DNA.
Before I go any further, let me remind you of my new book, ” Vegetable gardening Book: Your complete guide for growing an organic edible garden from seedling to harvest”. It is chock-full of new information and insider tips that will help you improve your gardening skills and overcome challenges.
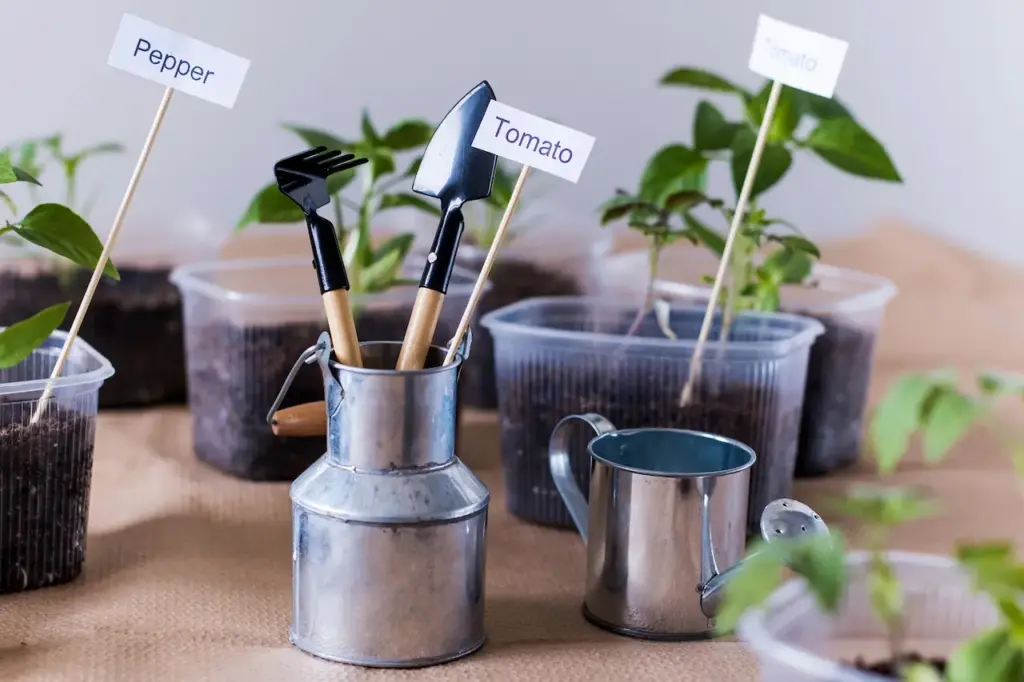
Containers for seed starting and trays
You have a wide range of options when it comes to choosing containers for seed-starting. There are so many retail products out there, and you can find a well-curated selection.
Standard industry size for compartmentalized seed starting trays is 10″ by 20″. Plastics are available in a variety of types, from the single-use plastics to the more durable plastics which are almost indestructible.
Some trays are segmented, with 128 openings on a tray down to 50, 36 or 18, etc. I prefer the 50-cell seed tray, but I also use many different sizes. Personal preference and the number of seeds you intend to sow will determine which size is best for you.
Conor Crickmore, of Neversink Farms in New York, has been a guest on the podcast to discuss market farming. Conor Crickmore has been on the podcast to talk about market farming. He’s also a product innovator. His seed trays are available in a variety of sizes, and they mimic soil blocking to allow more airflow for roots. This promotes quicker germination, and better root development.
How to Choose a Good Place to Plant Seeds
There are several things to keep in mind when deciding where you want to place your seed-starting trays. Choose a place where plants can grow after the seeds germinate. It is essential to have outlets near you so that you can use germination mats, timers and lights.
It is important to have access to water. You should feel comfortable refilling watering cans if your seed-starting location is a long way from a faucet. A warm spot is always better than a cool one. The top of refrigerators was once recommended as a place to germinate seeds. However, a modern fridge is unlikely to get as hot as an older appliance.
Soilless Mix for Planting
This is because it is sterile, unlike garden soil. It doesn’t contain the same microbial organisms as garden soil. The soil microbiology may be excellent, but can also contain pathogens which can kill seedlings as soon as they germinate. When starting seeds, soilless mixes are the best option.
You can fill two 10-by-20 inch seed trays with an 8-quart bag for between $7 and $12.
Peat moss is the most common soilless medium for seedlings. Peat moss has its pros and cons, but it is still the standard in commercial horticulture. Peat moss has been my source of choice for many years, but I’m aware of the problems that it can cause.
England will ban peat sales by home gardeners in 2024 to protect peatland, and prevent carbon from being released. Monty Don is the host of the “Gardeners’ World”, and a previous guest on the podcast, who has also pledged to avoid peat. You can listen to my podcast about the pros and cons of peat moss.
Peat moss is my favorite because it’s easy to use, cheap, and available.
The seeds are very responsive to peat moss because it has a high water holding capacity. When working with peat, there is a learning curve. You need to first understand that it is hydrophobic. It holds moisture for a very long time once it has absorbed it.
A wetting agent is usually included in professional seed starting mixes containing peat. This allows water to penetrate the peat. The wetting agent breaks down the barrier that makes peat moss naturally repel water. It’s rare to find a wetting agent in retail seed starting mixes, so you may have to do some work if you want your peat-based mix to be hydrated.
Perlite is a natural product which expands air spaces, which helps with root development. Perlite may look like styrofoam or popcorn, but is actually volcanic glass which has been heated and expanded. Vermiculite is another option. It has a flat, shiny texture that retains moisture well. Vermiculite, a natural product, is also expanded when exposed to heat.
Coir is a finely ground coconut fibre that is a good alternative to peat. Coir is the closest peat substitute that many gardeners have found. It feels the same, looks similar and is a good water-holding material. When the salt is removed from coir by a buffering process, it works very well as a starting medium for seeds.
The coir products sold by big-name brands are not buffered and, after extensive testing, I found that they did not work well as a medium for seedlings.
The coir also has the disadvantage of being shipped long distances to reach store shelves. There is also a large amount of deforestation where coconut trees are grown.
Pitt Moss is a new product for seed starting that has gained in popularity. It is made in Pennsylvania and is a recycled paper peat alternative. PittMoss has been refined and perfected over the last few years by their soil scientist.
The first time I used it was last year. I got some amazing results. I found that the PittMoss Plentiful product was better than the coir or peat moss I normally use. There is a slight learning curve for those who are used to peat or coir, as the watering needs are different. PittMoss can be an impressive alternative when you learn how to fine-tune the amount and frequency of watering.
Seed Starting Benefits
One of the biggest benefits to starting your own seedlings is that you can grow many varieties not available in your local nursery. You are not at the mercy what plants big box stores and garden centers decide to sell when you start your seeds.
Consider the difference in price between purchasing seeds and plants. Seed packet and seedling prices have both increased from their previous levels, but the seed packets still offer a huge saving compared to seedlings. You can get your own plants for pennies apiece, with a wide variety of options. Saving a few dollars is always welcome.
As long as your chosen variety suits the local climate and conditions, you can grow anything. You can order the seeds that you desire from one of many reputable companies that specialize in your niche.
You can also control the way you grow food and flowers by raising plants from seeds. You can grow plants organically if you are a gardener.
You might be wondering what you need to purchase to start seeds, and whether you will really save money. Good news! You can start your seeds using items you have in the house.
Recycled seed starting trays and containers
It’s easy to save money when you start seeds. You can use any container that has drainage holes and can hold around 2 inches of soil. Takeout containers that have holes punched into them make excellent seed starters, particularly the clamshell containers with transparent plastic lids. Pizza boxes were used to see how much I could plant for the least amount possible.
Containers need humidity domes in addition to drainage holes. Transparent covers, they keep moisture in and allow light to pass through. It is important to expose seedlings to light in order to avoid them becoming stretched out and spindly.
Many seed-starting kits include humidity domes, because seeds can never germinate if soil dries too fast. If you’re using containers that do not have a clear cover, you can create your own house with clear plastic.
After germination, remove the covers.
Soil Blocking
The traditional method of soil blocking involves pressing a soil mixture (compost, perlite, lime, peat moss, or coir with water, combined to a consistency similar to a brownie mix), into cubes measuring 2 inches. For the first two weeks, the moisture acts as a binding agent until the roots begin to take over.
When the roots reach the edge of a soil block, they will stop growing. This is because the soil has been removed. This is called “air-pruning” and temporarily stops the growth. It also prevents the roots from spiraling inside the container.
It’s a good technique but it takes a lot of time, so I don’t use it very often. You’ll need to work for quite a while if your soil blocker can only make four or five blocks per batch and you use 72-cell trays.
Conor’s Winstrip tray is the closest to soil blocking that there is. There is also a new product called Swift Blocker on the market, which produces up to 72 blocks of soil at once. I’m trying them myself. The reviews have been excellent. You can see my video of me using Winstrip trays to work in my greenhouse if you want to see them in action.
These products are worth investing in if you plan to do seed starting for a long time. These products will last a long time.
Germination Mats
Germination mats are also called propagation mats and heat mats. I consider them to be nice to have, but not essential.
Your seeds might not germinate if the room in which you’re starting your seeds is never warm enough for the soil to reach 70deg. Germination mats are a great solution. thermostat-controlled mats can be set to a desired temperature. cheaper mats have a temperature that is fixed at 75deg.
Grow Lights
You may think that you do not need lights if you have a south-facing sunny window where you can put your seeds. I’m here to dispel this notion. It’s rare that you have a window with a southerly orientation that receives all day sun, and that will give you enough light for your plants to grow strong and sturdy.
If they don’t get enough photosynthesis, seedlings will reach for the light. If you rely on a window to provide them with enough light, they will grow tall and leggy.
You don’t need to spend a lot of money on lighting. You can either buy a new shop light, or use an old shop light that has twin 4-foot-long fluorescent tubes of 40-watts you have in your basement or garage. The light tubes in the fixture are probably not as efficient as they once were because they lose their brightness over time. You may need to buy some new light bulbs, but it’s a relatively inexpensive investment.
If you are looking to purchase new shop lighting, you will probably find that LED shop lights work better and are more efficient.
You’ll be interested in an advanced lighting system if you are a gadget freak like me, and you understand how the frequency of light can affect a plant’s growth. This includes LED lighting which is often inexpensive. You can spend $20, $30 or so and go up from there into the couple-hundred-dollar range. You get what you buy. The more money you spend, then the more light is available to the plant. This is an important topic that we cover in great detail in Master Seed Starting.
Why Seeds Fail
If seedlings are leggy or spindly it may be because they have too much fertilizer. But, the most common cause is that they don’t get enough light. Seedlings need to be placed closer to light sources, but the distance depends on what type of light is used.
Another common problem is too much or not enough of water.
Another problem that you might encounter, and which is related to the reason we use sterile starting mix, is that your seedlings could die over night due to damping off. The seedlings may fall over, and the stem at the soil level will appear to be dissolved. Most often, this happens when you use a non-sterile seeding medium.
In addition to using sterile mixture, ensure that air circulates around the surface the trays as soon as the seeds germinate and for a few more weeks afterward. This can be done with a small, handheld fan.
There are a number of reasons why seeds will not germinate, no matter what. It could be that the seeds are too old to be viable or they may have been planted too deep or too shallow. The depth of the seed varies. The failure of the seeds to sprout could also be explained by the soil temperatures being too cold or warm. The optimal soil temperatures for different seeds are different, as well as their light requirements. Some seeds require light to germinate, while others can only germinate when it is dark. But remember that once the seedlings germinate, they will need light.
It is also possible that the type of seed starter mix you are using can explain why your seeds did not germinate. A heavy seed starting mix, for example, may be too moist to allow successful germination.
Racks
A good seed starter rack is another purchase that you might want to consider. I use baker’s wire racks made of stainless steel that can be found in big box stores. These racks cost about $110 to $120. They are on wheels and you can hang lights off of them. They hold up to four standard seed starting trays. These are great, and I’m sure the seed starters who have them also love them.
If you do not have the space for a rack, or do not want to spend money on one right now, then the top of a bookshelf or table can be used.
Timing
My seed starts growing in February, when I’m about eight weeks away from the last chance of frost. I cannot plant anything outdoors until the frost-free day has passed. The plants also need 6 to 8 weeks to grow indoors.
Enter your zip code to quickly find out the dates of your first and last frost at almanac.com. Count backwards from your last date of frost to determine the best time to start seeds indoors.
Watering
You will find it easy to water once you have found the sweet spot. You will probably either over- or underwater until you find the sweet spot. Under-watered seed embryos don’t have enough moisture to begin and complete germination. Overwatered plants can’t breath and will die.
It can take a lot of time to water your plants. In Master Seed Starting, I demonstrate how to create a self-watering device. This is a great way to ensure that your plants receive the right amount of water without over-watering them.
It’s not necessarily true that the tray is completely dry if you see the surface of the tray, where the sprouts appear. If you place lights on the top of your seed tray, the heat they generate can cause evaporation at the surface where the seed starter mix and seed live. You can’t tell if you need to water your plants by just looking at their surface. There could be enough moisture beneath the surface.
Top watering is the process of watering from above. You can use your watering jug and pour water in a circular motion until you think you have watered enough. This is something I try to avoid, especially if the seedlings are still young and tender. These drops of water can be a bit or a big slap to the seedlings, depending on their size and how finely they are broken. Bottom watering is my preferred method. This means that I allow the solid tray under the cell tray, to hold water. The seed starting mixture will draw moisture up through the holes of the cells.
Timing
My seed starts growing in February, when I’m about eight weeks away from the last chance of frost. I cannot plant anything outdoors until the frost-free day has passed. The plants also need 6 to 8 weeks to grow indoors.
Enter your zip code to quickly find out the dates of your first and last frost at almanac.com. Count backwards from your last date of frost to determine the best time to start seeds indoor